QorusDocs acquires Shark Finesse
Learn moreBook your demo
Please complete the form below and we will contact you to arrange a convenient time to show you how our software can help you.

Oops! Something went wrong while submitting the form.
Please complete the form below and we will contact you to arrange a convenient time to show you how our software can help you.
Each category within ValueHub will have 3 different ways to add benefits:
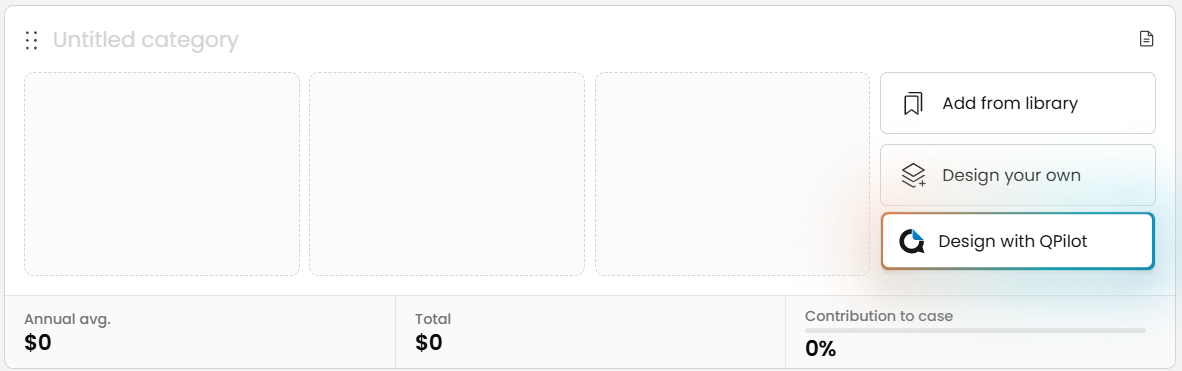
Here we will take you on a step-by-step guide showing you how to create a benefit using QPilot:
When Design with QPilot is selected, the QPilot Benefit Designer will open, here you need to write a prompt describing what you need the benefit to do, and then press Generate:
.png)
QPilot will design a calculation for you to review:
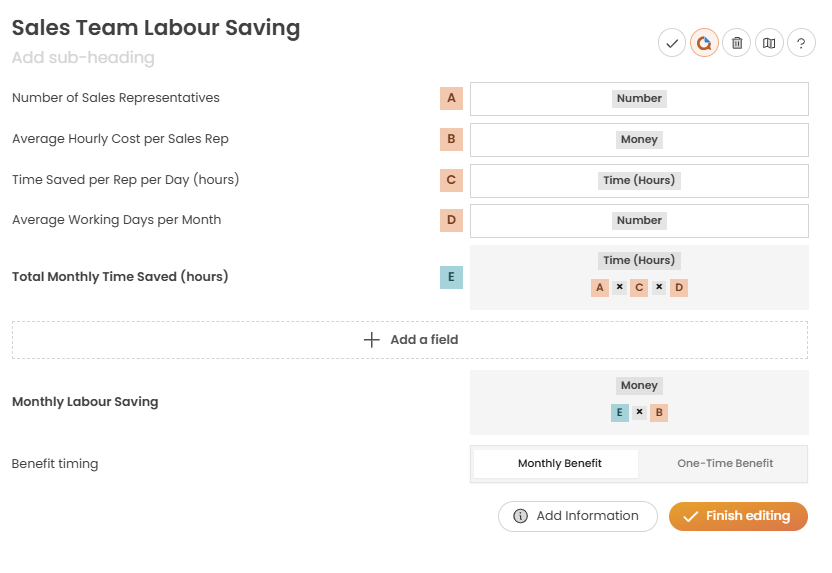
At this stage you can edit what has been generated for you, this includes the title as well as the calculation itself. To edit the calculation, you need to hover over a calculation field that you want to change and an edit (pencil icon) or delete (trash can icon) option will appear:

When edit is selected, the following window will open:
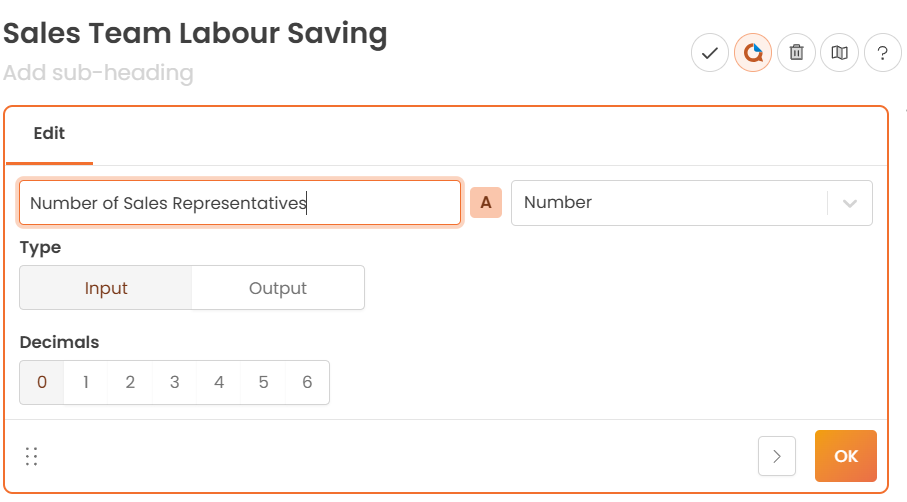
Click OK, when you're happy with the edits and you will be taken back to the QPilot Benefit Designer screen.
Once you're happy with the front end of the calculation, you can take a look at the Benefit Information, by clicking on the Add Information button this is where the Purpose, Assumption and Theory content has been added explaining how this benefit works:

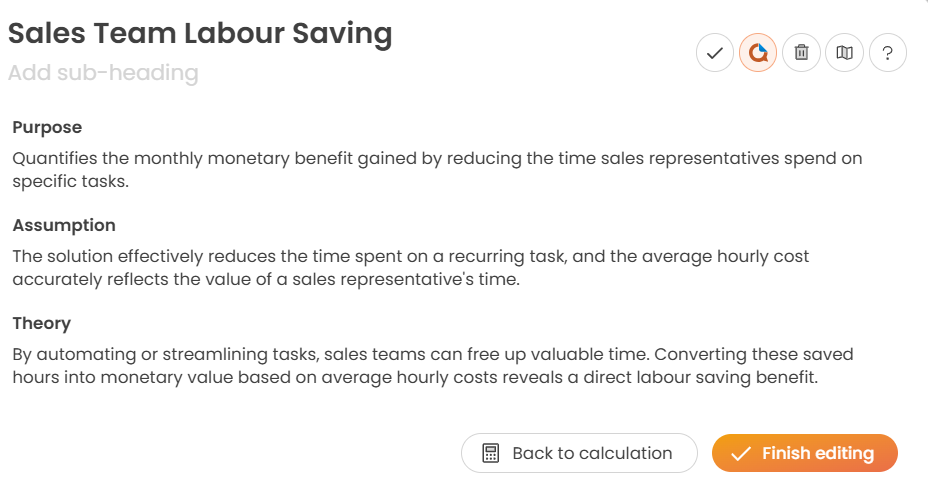
Again, this can be modified by hovering over any text that needs changing.
When you're happy with both the calculation and the information behind the calculation, you can click Finish editing to use this brand-new benefit.
* Available on Enterprise plans


We need to confirm your email address.
To complete the subscription process, please click the link in the email we just sent you.


